还在自己辛苦编写分布式 ID 生成工具?这款神器让你瞬间 “真香”
在日常开发中,我们通常需要自行实现分布式ID生成,但这种方式往往伴随着诸多问题,如性能瓶颈、重复ID风险等。为了解决这些问题,我们可以引入
Hazelcast,它提供了高效、可靠的分布式ID生成机制,帮助我们避免常见的陷阱,简化开发流程,提升系统稳定性。
一、基础依赖引入
<dependencies>
   <dependency>
       <groupId>org.springframework.boot</groupId>
       <artifactId>spring-boot-starter-web</artifactId>
   </dependency>
   <dependency>
       <groupId>com.hazelcast</groupId>
       <artifactId>hazelcast</artifactId>
       <version>5.5.0</version>
   </dependency>
</dependencies>
二、本地集成版本
添加Sprringboot配置类
import com.hazelcast.client.HazelcastClient;
import com.hazelcast.client.config.ClientConfig;
import com.hazelcast.client.config.ClientFlakeIdGeneratorConfig;
import com.hazelcast.core.HazelcastInstance;
import org.springframework.context.annotation.Bean;
import org.springframework.context.annotation.Configuration;

import static java.util.concurrent.TimeUnit.MINUTES;

/**
 * Hazelcast配置类
 * 创建flakeId生成器配置
 * 预取数量为10,预取有效期10分钟
 */
@Configuration
public class HazelcastConfig {

    @Bean
    public HazelcastInstance hazelcastInstance() {
        // 创建配置
        Config config = new Config();
        // 设置集群名称
        config.setClusterName("FlakeGenerator");
        // 创建flakeId生成器配置
        FlakeIdGeneratorConfig flakeIdGeneratorConfig = new FlakeIdGeneratorConfig("flake-id-generator");
        // 预取数量
        flakeIdGeneratorConfig.setPrefetchCount(10);
        // 预取有效期
        flakeIdGeneratorConfig.setPrefetchValidityMillis(MINUTES.toMillis(10));
        // 添加配置
        config.addFlakeIdGeneratorConfig(flakeIdGeneratorConfig);
        // 创建客户端
        return Hazelcast.newHazelcastInstance(config);
    }
}
添加访问接口类
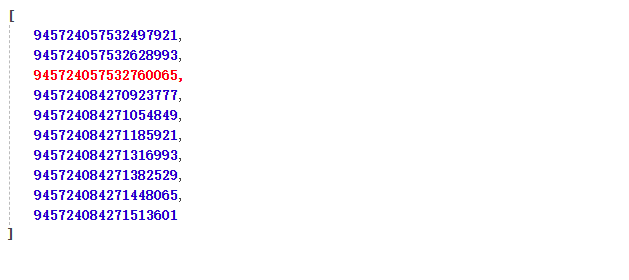
import com.hazelcast.core.HazelcastInstance; import com.hazelcast.flakeidgen.FlakeIdGenerator; import jakarta.annotation.Resource; import org.springframework.web.bind.annotation.RequestMapping; import org.springframework.web.bind.annotation.RestController; import java.util.ArrayList; import java.util.List; @RestController @RequestMapping("/hazelcast") public class HazelcastController { @Resource private HazelcastInstance hazelcastInstance; /** * 生成10个flakeId */ @RequestMapping("/gen") public List<Long> gen() { List<Long> flakeIds = new ArrayList<>(10); FlakeIdGenerator flakeIdGenerator = hazelcastInstance.getFlakeIdGenerator("flake-id-generator"); for (int i = 0; i < 10; i++) { flakeIds.add(flakeIdGenerator.newId()); } return flakeIds; } }浏览器访问http://127.0.0.1:8080/hazelcast/gen
生成数据结果如下:
三、服务器部署版
说明:此处操作系统以Rocky Linux v9.5为例
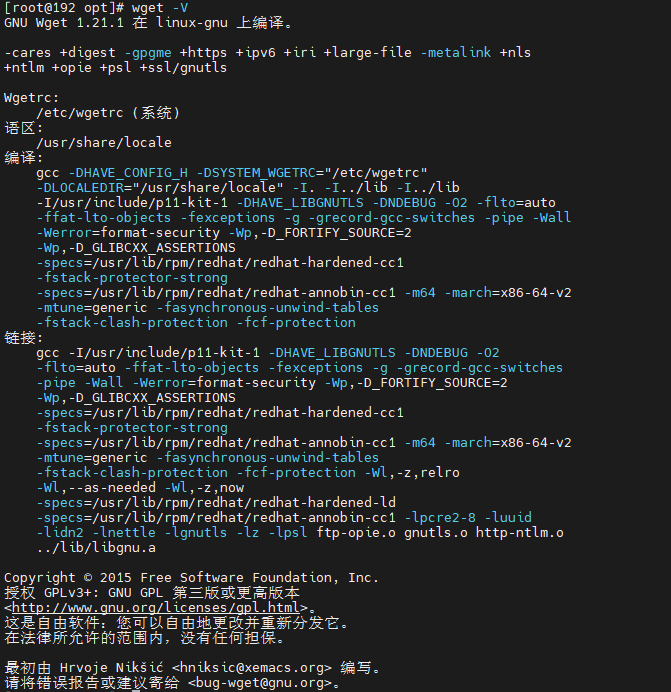
Hazelcast部署# 检查系统是否安装wget组件 wget -V出现如下内容,打印出wget版本,说明已经安装
如果没有安装则执行,sudo yum install -y wget
# 此处我们以rpm包的方式安装
# 下载hazelcast的rpm仓库依赖文件
wget https://repository.hazelcast.com/rpm/stable/hazelcast-rpm-stable.repo -O hazelcast-rpm-stable.repo
# 移动文件到/etc/yum.repos.d/文件夹下
sudo mv hazelcast-rpm-stable.repo /etc/yum.repos.d/
# 安装hazelcast
sudo yum install -y hazelcast-5.5.0
检查
Hzelcast是否安装成功# 检查是否安装成功,出现下图内容,则说明已经成功 hz -V
修改安装后的配置文件内容/usr/lib/hazelcast/config/hazelcast.xml
<?xml version="1.0" encoding="UTF-8"?>
<hazelcast xmlns="http://www.hazelcast.com/schema/config"
           xmlns:xsi="http://www.w3.org/2001/XMLSchema-instance"
           xsi:schemaLocation="http://www.hazelcast.com/schema/config
           http://www.hazelcast.com/schema/config/hazelcast-config-5.5.xsd">
    <!-- 需要修改的内容,集群名称,对应HazelcastServerConfig中的集群名称 -->
    <cluster-name>FlakeGenerator</cluster-name>

    <network>
        <!-- 修改interface标签中IP地址 -->
        <interfaces enabled="true">
            <interface>192.168.1.72</interface>
        </interfaces>
        <join>
             <!-- 修改member标签中IP地址 -->
            <tcp-ip enabled="true">
                <member-list>
                    <member>192.168.1.72</member>
                </member-list>
            </tcp-ip>
        </join>
    </network>
</hazelcast>
添加Sprringboot配置类
import com.hazelcast.client.HazelcastClient;
import com.hazelcast.client.config.ClientConfig;
import com.hazelcast.client.config.ClientFlakeIdGeneratorConfig;
import com.hazelcast.client.config.ClientNetworkConfig;
import com.hazelcast.core.HazelcastInstance;
import org.springframework.context.annotation.Bean;
import org.springframework.context.annotation.Configuration;

import java.util.List;

import static java.util.concurrent.TimeUnit.MINUTES;

/**
 * Hazelcast配置类
 * 创建flakeId生成器配置
 * 预取数量为10,预取有效期10分钟
 */
@Configuration
public class HazelcastServerConfig {

    @Bean
    public HazelcastInstance hazelcastInstance() {
        // 创建配置
        ClientConfig clientConfig = new ClientConfig();
        // 设置集群名称
        clientConfig.setClusterName("FlakeGenerator");
        // 创建flakeId生成器配置
        ClientFlakeIdGeneratorConfig clientFlakeIdGeneratorConfig = new ClientFlakeIdGeneratorConfig("flake-id-generator");
        // 预取数量
        clientFlakeIdGeneratorConfig.setPrefetchCount(10);
        // 预取有效期
        clientFlakeIdGeneratorConfig.setPrefetchValidityMillis(MINUTES.toMillis(10));
        // 添加配置
        clientConfig.addFlakeIdGeneratorConfig(clientFlakeIdGeneratorConfig);
        // 设置网络配置
        ClientNetworkConfig clientNetworkConfig = new ClientNetworkConfig();
        // 设置集群地址
        clientNetworkConfig.setAddresses(List.of("192.168.1.72:5701"));
        clientConfig.setNetworkConfig(clientNetworkConfig);

        // 创建客户端
        return HazelcastClient.newHazelcastClient(clientConfig);
    }
}
添加访问接口类
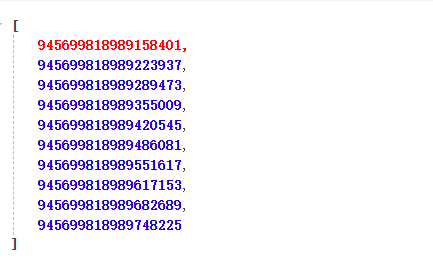
import com.hazelcast.core.HazelcastInstance; import com.hazelcast.flakeidgen.FlakeIdGenerator; import jakarta.annotation.Resource; import org.springframework.web.bind.annotation.RequestMapping; import org.springframework.web.bind.annotation.RestController; import java.util.ArrayList; import java.util.List; @RestController @RequestMapping("/hazelcast") public class HazelcastController { @Resource private HazelcastInstance hazelcastInstance; /** * 生成10个flakeId */ @RequestMapping("/gen") public List<Long> gen() { List<Long> flakeIds = new ArrayList<>(10); FlakeIdGenerator flakeIdGenerator = hazelcastInstance.getFlakeIdGenerator("flake-id-generator"); for (int i = 0; i < 10; i++) { flakeIds.add(flakeIdGenerator.newId()); } return flakeIds; } }浏览器访问http://127.0.0.1:8080/hazelcast/gen
生成数据结果如下: